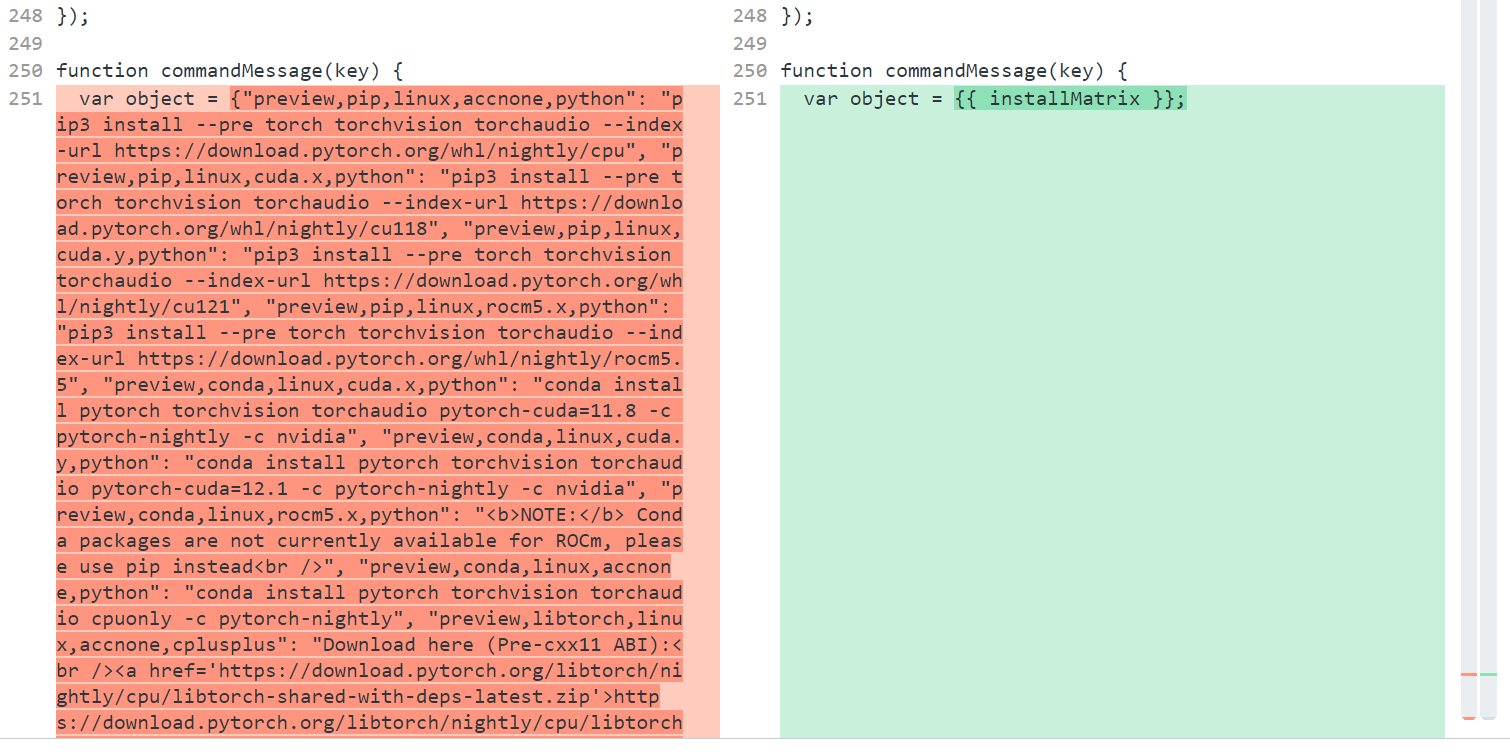
- function commandMessage(key) {
- var object = {"preview,pip,linux,accnone,python": "pip3 install --pre torch torchvision torchaudio --index-url https://download.pytorch.org/whl/nightly/cpu", "preview,pip,linux,cuda.x,python": "pip3 install --pre torch torchvision torchaudio --index-url https://download.pytorch.org/whl/nightly/cu118", "preview,pip,linux,cuda.y,python": "pip3 install --pre torch torchvision torchaudio --index-url https://download.pytorch.org/whl/nightly/cu121", "preview,pip,linux,rocm5.x,python": "pip3 install --pre torch torchvision torchaudio --index-url https://download.pytorch.org/whl/nightly/rocm5.5", "preview,conda,linux,cuda.x,python": "conda install pytorch torchvision torchaudio pytorch-cuda=11.8 -c pytorch-nightly -c nvidia", "preview,conda,linux,cuda.y,python": "conda install pytorch torchvision torchaudio pytorch-cuda=12.1 -c pytorch-nightly -c nvidia", "preview,conda,linux,rocm5.x,python": "<b>NOTE:</b> Conda packages are not currently available for ROCm, please use pip instead<br />", "preview,conda,linux,accnone,python": "conda install pytorch torchvision torchaudio cpuonly -c pytorch-nightly", "preview,libtorch,linux,accnone,cplusplus": "Download here (Pre-cxx11 ABI):<br /><a href='https://download.pytorch.org/libtorch/nightly/cpu/libtorch-shared-with-deps-latest.zip'>https://download.pytorch.org/libtorch/nightly/cpu/libtorch-shared-with-deps-latest.zip</a><br />Download here (cxx11 ABI):<br /><a href='https://download.pytorch.org/libtorch/nightly/cpu/libtorch-cxx11-abi-shared-with-deps-latest.zip'>https://download.pytorch.org/libtorch/nightly/cpu/libtorch-cxx11-abi-shared-with-deps-latest.zip</a>", "preview,libtorch,linux,cuda.x,cplusplus": "Download here (Pre-cxx11 ABI):<br /><a href='https://download.pytorch.org/libtorch/nightly/cu118/libtorch-shared-with-deps-latest.zip'>https://download.pytorch.org/libtorch/nightly/cu118/libtorch-shared-with-deps-latest.zip</a><br />Download here (cxx11 ABI):<br /><a href='https://download.pytorch.org/libtorch/nightly/cu118/libtorch-cxx11-abi-shared-with-deps-latest.zip'>https://download.pytorch.org/libtorch/nightly/cu118/libtorch-cxx11-abi-shared-with-deps-latest.zip</a>", "preview,libtorch,linux,cuda.y,cplusplus": "Download here (Pre-cxx11 ABI):<br /><a href='https://download.pytorch.org/libtorch/nightly/cu121/libtorch-shared-with-deps-latest.zip'>https://download.pytorch.org/libtorch/nightly/cu121/libtorch-shared-with-deps-latest.zip</a><br />Download here (cxx11 ABI):<br /><a href='https://download.pytorch.org/libtorch/nightly/cu121/libtorch-cxx11-abi-shared-with-deps-latest.zip'>https://download.pytorch.org/libtorch/nightly/cu121/libtorch-cxx11-abi-shared-with-deps-latest.zip</a>", "preview,libtorch,linux,rocm5.x,cplusplus": "Download here (Pre-cxx11 ABI):<br /><a href='https://download.pytorch.org/libtorch/nightly/rocm5.5/libtorch-shared-with-deps-latest.zip'>https://download.pytorch.org/libtorch/nightly/rocm5.5/libtorch-shared-with-deps-latest.zip</a><br />Download here (cxx11 ABI):<br /><a href='https://download.pytorch.org/libtorch/nightly/rocm5.5/libtorch-cxx11-abi-shared-with-deps-latest.zip'>https://download.pytorch.org/libtorch/nightly/rocm5.5/libtorch-cxx11-abi-shared-with-deps-latest.zip</a>", "preview,pip,macos,cuda.x,python": "# CUDA is not available on MacOS, please use default package<br />pip3 install --pre torch torchvision torchaudio --index-url https://download.pytorch.org/whl/nightly/cpu", "preview,pip,macos,cuda.y,python": "# CUDA is not available on MacOS, please use default package<br />pip3 install --pre torch torchvision torchaudio --index-url https://download.pytorch.org/whl/nightly/cpu", "preview,pip,macos,rocm5.x,python": "# ROCm is not available on MacOS, please use default package<br />pip3 install --pre torch torchvision torchaudio --index-url https://download.pytorch.org/whl/nightly/cpu", "preview,pip,macos,accnone,python": "# MPS acceleration is available on MacOS 12.3+<br />pip3 install --pre torch torchvision torchaudio --index-url https://download.pytorch.org/whl/nightly/cpu", "preview,conda,macos,cuda.x,python": "# CUDA is not available on MacOS, please use default package<br />conda install pytorch-nightly::pytorch torchvision torchaudio -c pytorch-nightly", "preview,conda,macos,cuda.y,python": "# CUDA is not available on MacOS, please use default package<br />conda install pytorch-nightly::pytorch torchvision torchaudio -c pytorch-nightly", "preview,conda,macos,rocm5.x,python": "# ROCm is not available on MacOS, please use default package<br />conda install pytorch-nightly::pytorch torchvision torchaudio -c pytorch-nightly", "preview,conda,macos,accnone,python": "# MPS acceleration is available on MacOS 12.3+<br />conda install pytorch-nightly::pytorch torchvision torchaudio -c pytorch-nightly", "preview,libtorch,macos,accnone,cplusplus": "Download default libtorch here (ROCm and CUDA are not supported):<br /><a href='https://download.pytorch.org/libtorch/nightly/cpu/libtorch-macos-latest.zip'>https://download.pytorch.org/libtorch/nightly/cpu/libtorch-macos-latest.zip</a>", "preview,libtorch,macos,cuda.x,cplusplus": "Download default libtorch here (ROCm and CUDA are not supported):<br /><a href='https://download.pytorch.org/libtorch/nightly/cpu/libtorch-macos-latest.zip'>https://download.pytorch.org/libtorch/nightly/cpu/libtorch-macos-latest.zip</a>", "preview,libtorch,macos,cuda.y,cplusplus": "Download default libtorch here (ROCm and CUDA are not supported):<br /><a href='https://download.pytorch.org/libtorch/nightly/cpu/libtorch-macos-latest.zip'>https://download.pytorch.org/libtorch/nightly/cpu/libtorch-macos-latest.zip</a>", "preview,libtorch,macos,rocm5.x,cplusplus": "Download default libtorch here (ROCm and CUDA are not supported):<br /><a href='https://download.pytorch.org/libtorch/nightly/cpu/libtorch-macos-latest.zip'>https://download.pytorch.org/libtorch/nightly/cpu/libtorch-macos-latest.zip</a>", "preview,pip,windows,accnone,python": "pip3 install --pre torch torchvision torchaudio --index-url https://download.pytorch.org/whl/nightly/cpu", "preview,pip,windows,cuda.x,python": "pip3 install --pre torch torchvision torchaudio --index-url https://download.pytorch.org/whl/nightly/cu118", "preview,pip,windows,cuda.y,python": "pip3 install --pre torch torchvision torchaudio --index-url https://download.pytorch.org/whl/nightly/cu121", "preview,pip,windows,rocm5.x,python": "<b>NOTE:</b> ROCm is not available on Windows", "preview,conda,windows,cuda.x,python": "conda install pytorch torchvision torchaudio pytorch-cuda=11.8 -c pytorch-nightly -c nvidia", "preview,conda,windows,cuda.y,python": "conda install pytorch torchvision torchaudio pytorch-cuda=12.1 -c pytorch-nightly -c nvidia", "preview,conda,windows,rocm5.x,python": "<b>NOTE:</b> ROCm is not available on Windows", "preview,conda,windows,accnone,python": "conda install pytorch torchvision torchaudio cpuonly -c pytorch-nightly", "preview,libtorch,windows,accnone,cplusplus": "Download here (Release version):<br /><a href='https://download.pytorch.org/libtorch/nightly/cpu/libtorch-win-shared-with-deps-latest.zip'>https://download.pytorch.org/libtorch/nightly/cpu/libtorch-win-shared-with-deps-latest.zip</a><br />Download here (Debug version):<br /><a href='https://download.pytorch.org/libtorch/nightly/cpu/libtorch-win-shared-with-deps-debug-latest.zip'>https://download.pytorch.org/libtorch/nightly/cpu/libtorch-win-shared-with-deps-debug-latest.zip</a>", "preview,libtorch,windows,cuda.x,cplusplus": "Download here (Release version):<br /><a href='https://download.pytorch.org/libtorch/nightly/cu118/libtorch-win-shared-with-deps-latest.zip'>https://download.pytorch.org/libtorch/nightly/cu118/libtorch-win-shared-with-deps-latest.zip</a><br />Download here (Debug version):<br /><a href='https://download.pytorch.org/libtorch/nightly/cu118/libtorch-win-shared-with-deps-debug-latest.zip'>https://download.pytorch.org/libtorch/nightly/cu118/libtorch-win-shared-with-deps-debug-latest.zip</a>", "preview,libtorch,windows,cuda.y,cplusplus": "Download here (Release version):<br /><a href='https://download.pytorch.org/libtorch/nightly/cu121/libtorch-win-shared-with-deps-latest.zip'>https://download.pytorch.org/libtorch/nightly/cu121/libtorch-win-shared-with-deps-latest.zip</a><br />Download here (Debug version):<br /><a href='https://download.pytorch.org/libtorch/nightly/cu121/libtorch-win-shared-with-deps-debug-latest.zip'>https://download.pytorch.org/libtorch/nightly/cu121/libtorch-win-shared-with-deps-debug-latest.zip</a>", "preview,libtorch,windows,rocm5.x,cplusplus": "<b>NOTE:</b> ROCm is not available on Windows", "stable,pip,linux,accnone,python": "pip3 install torch torchvision torchaudio --index-url https://download.pytorch.org/whl/cpu", "stable,pip,linux,cuda.x,python": "pip3 install torch torchvision torchaudio", "stable,pip,linux,cuda.y,python": "pip3 install torch torchvision torchaudio --index-url https://download.pytorch.org/whl/cu118", "stable,pip,linux,rocm5.x,python": "pip3 install torch torchvision torchaudio --index-url https://download.pytorch.org/whl/rocm5.4.2", "stable,conda,linux,cuda.x,python": "conda install pytorch torchvision torchaudio pytorch-cuda=11.7 -c pytorch -c nvidia", "stable,conda,linux,cuda.y,python": "conda install pytorch torchvision torchaudio pytorch-cuda=11.8 -c pytorch -c nvidia", "stable,conda,linux,rocm5.x,python": "<b>NOTE:</b> Conda packages are not currently available for ROCm, please use pip instead<br />", "stable,conda,linux,accnone,python": "conda install pytorch torchvision torchaudio cpuonly -c pytorch", "stable,libtorch,linux,accnone,cplusplus": "Download here (Pre-cxx11 ABI):<br /><a href='https://download.pytorch.org/libtorch/cpu/libtorch-shared-with-deps-2.0.1%2Bcpu.zip'>https://download.pytorch.org/libtorch/cpu/libtorch-shared-with-deps-2.0.1%2Bcpu.zip</a><br />Download here (cxx11 ABI):<br /><a href='https://download.pytorch.org/libtorch/cpu/libtorch-cxx11-abi-shared-with-deps-2.0.1%2Bcpu.zip'>https://download.pytorch.org/libtorch/cpu/libtorch-cxx11-abi-shared-with-deps-2.0.1%2Bcpu.zip</a>", "stable,libtorch,linux,cuda.x,cplusplus": "Download here (Pre-cxx11 ABI):<br /><a href='https://download.pytorch.org/libtorch/cu117/libtorch-shared-with-deps-2.0.1%2Bcu117.zip'>https://download.pytorch.org/libtorch/cu117/libtorch-shared-with-deps-2.0.1%2Bcu117.zip</a><br />Download here (cxx11 ABI):<br /><a href='https://download.pytorch.org/libtorch/cu117/libtorch-cxx11-abi-shared-with-deps-2.0.1%2Bcu117.zip'>https://download.pytorch.org/libtorch/cu117/libtorch-cxx11-abi-shared-with-deps-2.0.1%2Bcu117.zip</a>", "stable,libtorch,linux,cuda.y,cplusplus": "Download here (Pre-cxx11 ABI):<br /><a href='https://download.pytorch.org/libtorch/cu118/libtorch-shared-with-deps-2.0.1%2Bcu118.zip'>https://download.pytorch.org/libtorch/cu118/libtorch-shared-with-deps-2.0.1%2Bcu118.zip</a><br />Download here (cxx11 ABI):<br /><a href='https://download.pytorch.org/libtorch/cu118/libtorch-cxx11-abi-shared-with-deps-2.0.1%2Bcu118.zip'>https://download.pytorch.org/libtorch/cu118/libtorch-cxx11-abi-shared-with-deps-2.0.1%2Bcu118.zip</a>", "stable,libtorch,linux,rocm5.x,cplusplus": "Download here (Pre-cxx11 ABI):<br /><a href='https://download.pytorch.org/libtorch/rocm5.4.2/libtorch-shared-with-deps-2.0.1%2Brocm5.4.2.zip'>https://download.pytorch.org/libtorch/rocm5.4.2/libtorch-shared-with-deps-2.0.1%2Brocm5.4.2.zip</a><br />Download here (cxx11 ABI):<br /><a href='https://download.pytorch.org/libtorch/rocm5.4.2/libtorch-cxx11-abi-shared-with-deps-2.0.1%2Brocm5.4.2.zip'>https://download.pytorch.org/libtorch/rocm5.4.2/libtorch-cxx11-abi-shared-with-deps-2.0.1%2Brocm5.4.2.zip</a>", "stable,pip,macos,cuda.x,python": "# CUDA is not available on MacOS, please use default package<br />pip3 install torch torchvision torchaudio", "stable,pip,macos,cuda.y,python": "# CUDA is not available on MacOS, please use default package<br />pip3 install torch torchvision torchaudio", "stable,pip,macos,rocm5.x,python": "# ROCm is not available on MacOS, please use default package<br />pip3 install torch torchvision torchaudio", "stable,pip,macos,accnone,python": "# MPS acceleration is available on MacOS 12.3+<br />pip3 install torch torchvision torchaudio", "stable,conda,macos,cuda.x,python": "# CUDA is not available on MacOS, please use default package<br />conda install pytorch::pytorch torchvision torchaudio -c pytorch", "stable,conda,macos,cuda.y,python": "# CUDA is not available on MacOS, please use default package<br />conda install pytorch::pytorch torchvision torchaudio -c pytorch", "stable,conda,macos,rocm5.x,python": "# ROCm is not available on MacOS, please use default package<br />conda install pytorch::pytorch torchvision torchaudio -c pytorch", "stable,conda,macos,accnone,python": "# MPS acceleration is available on MacOS 12.3+<br />conda install pytorch::pytorch torchvision torchaudio -c pytorch", "stable,libtorch,macos,accnone,cplusplus": "Download default libtorch here (ROCm and CUDA are not supported):<br /><a href='https://download.pytorch.org/libtorch/cpu/libtorch-macos-2.0.1.zip'>https://download.pytorch.org/libtorch/cpu/libtorch-macos-2.0.1.zip</a>", "stable,libtorch,macos,cuda.x,cplusplus": "Download default libtorch here (ROCm and CUDA are not supported):<br /><a href='https://download.pytorch.org/libtorch/cpu/libtorch-macos-2.0.1.zip'>https://download.pytorch.org/libtorch/cpu/libtorch-macos-2.0.1.zip</a>", "stable,libtorch,macos,cuda.y,cplusplus": "Download default libtorch here (ROCm and CUDA are not supported):<br /><a href='https://download.pytorch.org/libtorch/cpu/libtorch-macos-2.0.1.zip'>https://download.pytorch.org/libtorch/cpu/libtorch-macos-2.0.1.zip</a>", "stable,libtorch,macos,rocm5.x,cplusplus": "Download default libtorch here (ROCm and CUDA are not supported):<br /><a href='https://download.pytorch.org/libtorch/cpu/libtorch-macos-2.0.1.zip'>https://download.pytorch.org/libtorch/cpu/libtorch-macos-2.0.1.zip</a>", "stable,pip,windows,accnone,python": "pip3 install torch torchvision torchaudio", "stable,pip,windows,cuda.x,python": "pip3 install torch torchvision torchaudio --index-url https://download.pytorch.org/whl/cu117", "stable,pip,windows,cuda.y,python": "pip3 install torch torchvision torchaudio --index-url https://download.pytorch.org/whl/cu118", "stable,pip,windows,rocm5.x,python": "<b>NOTE:</b> ROCm is not available on Windows", "stable,conda,windows,cuda.x,python": "conda install pytorch torchvision torchaudio pytorch-cuda=11.7 -c pytorch -c nvidia", "stable,conda,windows,cuda.y,python": "conda install pytorch torchvision torchaudio pytorch-cuda=11.8 -c pytorch -c nvidia", "stable,conda,windows,rocm5.x,python": "<b>NOTE:</b> ROCm is not available on Windows", "stable,conda,windows,accnone,python": "conda install pytorch torchvision torchaudio cpuonly -c pytorch", "stable,libtorch,windows,accnone,cplusplus": "Download here (Release version):<br /><a href='https://download.pytorch.org/libtorch/cpu/libtorch-win-shared-with-deps-2.0.1%2Bcpu.zip'>https://download.pytorch.org/libtorch/cpu/libtorch-win-shared-with-deps-2.0.1%2Bcpu.zip</a><br />Download here (Debug version):<br /><a href='https://download.pytorch.org/libtorch/cpu/libtorch-win-shared-with-deps-debug-2.0.1%2Bcpu.zip'>https://download.pytorch.org/libtorch/cpu/libtorch-win-shared-with-deps-debug-2.0.1%2Bcpu.zip</a>", "stable,libtorch,windows,cuda.x,cplusplus": "Download here (Release version):<br /><a href='https://download.pytorch.org/libtorch/cu117/libtorch-win-shared-with-deps-2.0.1%2Bcu117.zip'>https://download.pytorch.org/libtorch/cu117/libtorch-win-shared-with-deps-2.0.1%2Bcu117.zip</a><br />Download here (Debug version):<br /><a href='https://download.pytorch.org/libtorch/cu117/libtorch-win-shared-with-deps-debug-2.0.1%2Bcu117.zip'>https://download.pytorch.org/libtorch/cu117/libtorch-win-shared-with-deps-debug-2.0.1%2Bcu117.zip</a>", "stable,libtorch,windows,cuda.y,cplusplus": "Download here (Release version):<br /><a href='https://download.pytorch.org/libtorch/cu118/libtorch-win-shared-with-deps-2.0.1%2Bcu118.zip'>https://download.pytorch.org/libtorch/cu118/libtorch-win-shared-with-deps-2.0.1%2Bcu118.zip</a><br />Download here (Debug version):<br /><a href='https://download.pytorch.org/libtorch/cu118/libtorch-win-shared-with-deps-debug-2.0.1%2Bcu118.zip'>https://download.pytorch.org/libtorch/cu118/libtorch-win-shared-with-deps-debug-2.0.1%2Bcu118.zip</a>", "stable,libtorch,windows,rocm5.x,cplusplus": "<b>NOTE:</b> ROCm is not available on Windows"};
- if (!object.hasOwnProperty(key)) {
- $("#command").html(
- "<pre> # Follow instructions at this URL: https://github.com/pytorch/pytorch#from-source </pre>"
- );
- } else if (key.indexOf("lts") == 0 && key.indexOf('rocm') < 0) {
- $("#command").html("<pre>" + object[key] + "</pre>");
- } else {
- $("#command").html("<pre>" + object[key] + "</pre>");
- }
- }
This file has been truncated. show original